
Local Playground Communication Board

My sister and I started this journey while walking around Mirror Lake (a 2.7 mile walk around a lake passing by a beach, tennis courts, and town with Mountain views). As an early intervention and preschool SLP, I thought it would be great to have a communication board built at our local playground to provide a mode of communication for non verbal, minimally verbal and individuals who have any difficulty with communication. In addition, a playground communication board would also facilitate young children's learning of new vocabulary and reading. This board would be an important accessibility option as well as an awareness tool in Lake Placid.
My sister is a real-estate agent and she is great at getting things done quickly and efficiently, so we made a great team since I was the “Communication expert”! I have been using symbols from “Smarty Symbols” company with my students for communication for a few years and knew that the company recently started to create community and school communication boards.

The following steps are just a guideline for others who would like to implement a communication board in their community or school, since they are specific to our area. I hope you find this helpful and we see communication boards like these in more places! We went through the following steps to make this board a reality!
Find designers that create these boards or create the symbols. I read and researched about some people who created boards using Boardmaker® symbols and used local sign companies or organizations who were interested in building signs to after they were printed on a larger scale. Since I was already using Smarty Symbols with my students, I combed through Smarty Symbols website https://smartysymbols.com/playground-communication-board about community communication boards. The website answered our initial questions about size, cost and materials for the board and gave us materials that we could use in any presentations. There are plenty of pictures of sample boards on the site and they provide a pamphlet to use. After looking through the site, we had a phone conversation and got more specific help from a representative from SmartySymbols (Remi Salami). She was super helpful and as a fellow SLP, she was a wonderful resource!
Met with our local government boards to get the installation approved. In Lake Placid, we had to get approval from the Village Board before anything, since the playground is housed in the Village.
We prepared a short 7 minute presentation on answering 3 questions: What is a playground communication board?; How will it benefit our community? and How much does it cost? (we also answered specific questions regarding size, best materials to use and the possibility of having a bilingual board).
The Village Board loved the idea and even suggested having boards in other locations in the village after seeing how this “pilot communication board” did. The Village board eventually agreed to pay half of the cost if the Town Board paid the rest. We had an appointment to present to the Town Board at the end of July, but luckily a local organization stepped up to cover the full cost!
3. Locate Funding for the Playground Communication Board.
We posted the potential project on our local community Facebook page and were met with really positive responses. People offered suggestions on where to get funding. Some options from that post and other options that we explored were funding from State Grants, funding from local organizations like Rotary Club, Lions Club, Kiwanis Club, Go Fund Me page, donations from local businesses and individuals in the community. I would advise you to ask in your own communities. This is such a positive project!
4. After the final approval from the Village Board, we met with the Village “Appearance Committee”. With input from us, this committee approved placement of the board (we wanted double sided to allow access from the playground and from other on the walkway walking passed the playground toward our beach), and we discussed general aesthetics of the board (i.e. the colors of the board background, the height of the board and the posts and frame). The village agreed to install the board at no cost! During our meeting with the committee, one of the members suggested that our local “Chamber of Commerce” (called ROOST Regional Office of Sustainable Tourism) would pay in full for the board. The next morning she emailed with the great news that they would pay for the communication board and posts (and frame if needed).
5) Symbol Selection. Smarty Symbols has complete boards as samples and allows the purchaser to add symbols that are specific to your area. The board includes verbs, greetings, playground equipment, basic needs symbols, questions, feelings in addition to letters and numbers. The only issue with adding symbols is that to add a symbol, another has to be taken away. As a SLP who has been designing picture boards for my students, I knew what I wanted to add. I wanted the board to be as functional as possible for as many as possible and I wanted the board to be used for communication during play! It was really important to not only have symbols for basic needs (i.e.”hungry, cold”) but also incorporate symbols to enhance play and fun (i.e. “swing, jump, come with me”). We added symbols like “Go to the beach”, “Let’s play tennis” and “mountains” because our specific location includes these areas. We were able to combine some symbols into one to make room for our new symbols.

Communication Board out of the box from Smarty Symbols
For your board, be sure to include symbols specific to your location, include symbols for basic needs AND play. Keep in mind with Smarty Symbols boards, the more symbols you change, the more it costs.
We also wanted the words under the symbols to be both English and Spanish. There was some discussion about English and French since we live so close to the Canadian Border, but we decided on Spanish for this board since we have many Spanish only speaking visitors to our area (maybe if we have another board, it will have French!).

The Framed Board
The Lake Placid Village Staff framed the board with pine and added plexiglass to both sides to protect from our harsh winters.
6) After we got the board delivered, we brought it to the Village Department and after a discussion about how we wanted it mounted, they worked their magic! Our area gets tons of snow and harsh weather, so the Village workers encased the board in a wooden frame with plexiglass on both sides. They mounted the board with chains onto log posts to fit in with our Adirondack theme.
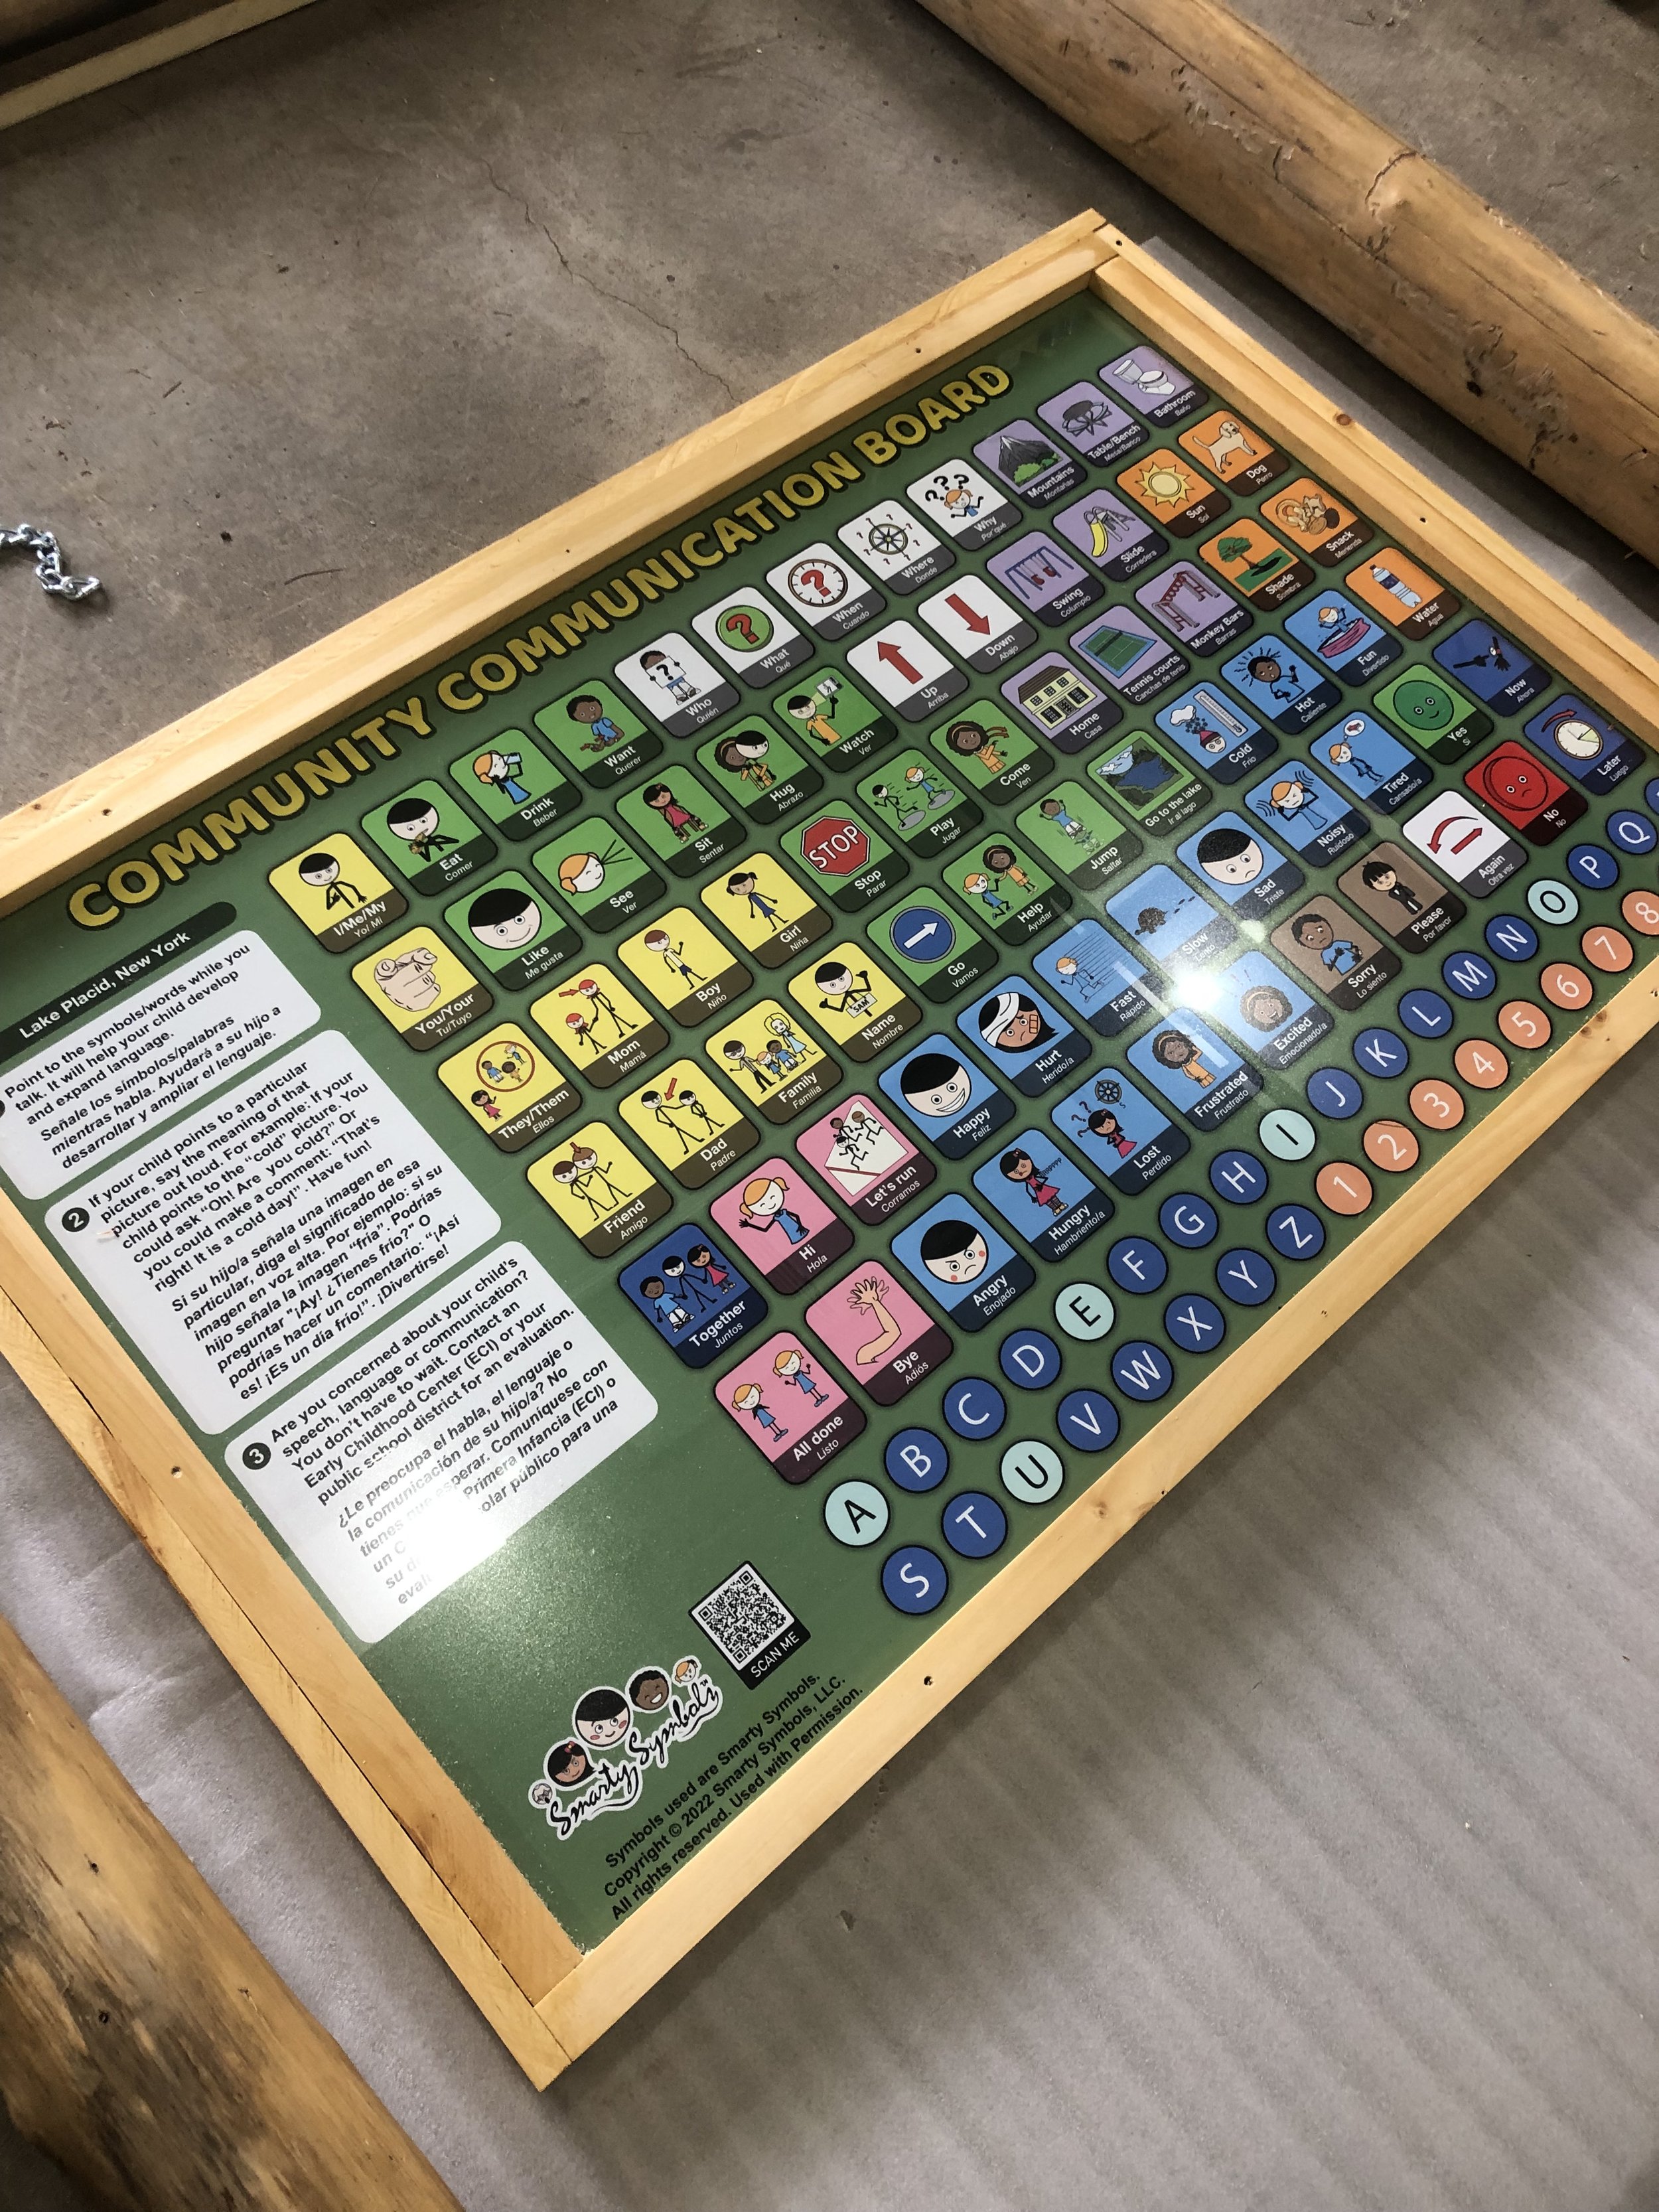
Added symbols that personalized the board for our community including “mountains, lake, dog and tennis courts”

The completed Playground Communication Board Project! A combined effort and we are so pleased with the result!

Communication Board
Book
Here is a free foldable, printable story that I made and used with my students that you could use also! (click the picture for your own copy)